This article may contain compensated links. Learn more in our disclaimer.
Are you currently thinking of doing the Annapurna Circuit trek?
If the answer is yes, then you have found yourself in the right place. I have done the Annapurna Circuit in Nepal twice. Once in mid-March, when the hiking season in Himalayas is only starting, another time in June, when it’s considered off-season. And I would definitely do it again. Because of how beautiful is this trail.
Here I’m gonna share with you everything you need to know to do the Annapurna Circuit on your own.
Everything from Annapurna Circuit itinerary to weather conditions in the particular region of Nepal. Since I’ve always been traveling on my own, I’ll also talk about transportation in Nepal. What are the best options for getting around in Nepal and getting to and from the trek. What are the options, pros and cons of every mode of transportation.
Plus I’m also sharing with you my Annapurna Circuit packing list, cost estimates and few more practical tips I learned along the way.

Table of Contents
Annapurna Circuit Trek: Basics
As the name suggests, the Annapurna Circuit is a trail that goes almost all the way around the Annapurna massif.
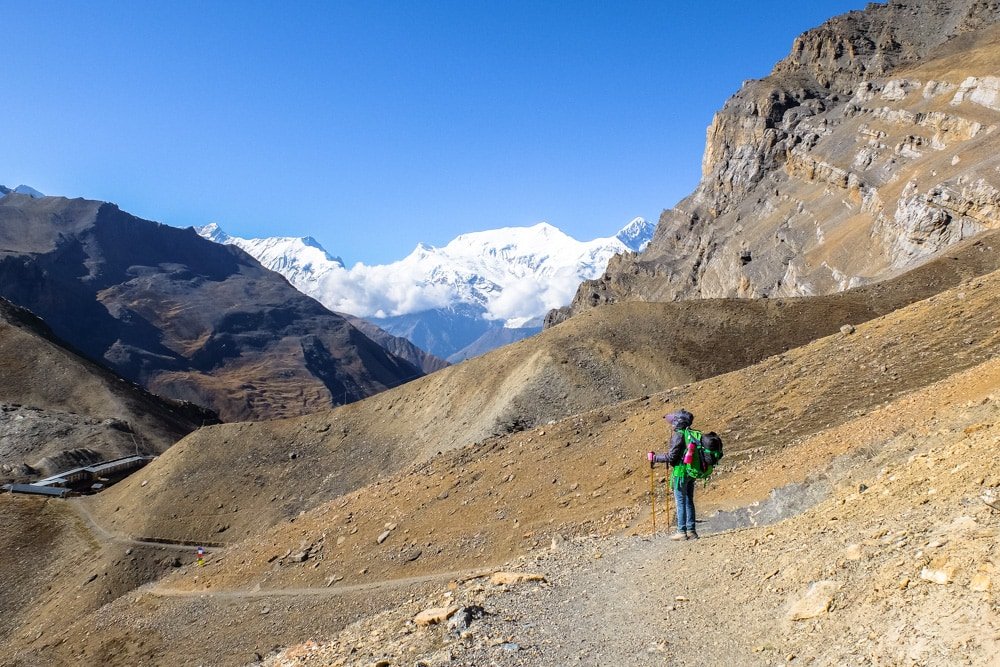
See the photo above? It’s Annapurna II, one of the beautiful peaks you’ll see while hiking the Annapurna Circuit. The Annapurna massif consists of several such peaks. And Annapurna II is one of the 6 peaks with elevation of over 23,620 ft / 7,200 m.
DISTANCE: around 124 miles / 200 km.
WHEN: the best season for the Annapurna Circuit is autumn (October, November) and late spring (April).
DAYS: 10+ days of hiking.
BUDGET: around 20 USD/day (per person); around 30 USD/day (per couple).

Getting Ready for the Annapurna Circuit Trek: Step by Step
Are you excited already? Because I am.
You have now officially started planning your own Annapurna Circuit adventure!
Step 1: Packing Your Backpack for an Adventure
You’ll find my Annapurna Circuit packing list further below.
All in all, if you’re going during a season you will need the same gear you would use for any other hike in the mountains. Four of the most important items: comfortable hiking shoes or boots, a quality backpack, a rain jacket and a sleeping bag. More on that further below.
Step 2: Traveling to Nepal
There is only one international airport in Nepal, and that’s Tribhuvan International airport in Kathmandu.
Most of flights to and from Nepal have 2 layovers. So don’t be surprised about that, when you’ll be looking for flights to Nepal. Fuel is expensive in Nepal and there is shortage of it, hence the extra stop.
It’s possible to travel to Nepal overland from India. You can book the bus ticket online.

Step 3: Obtaining Nepalese Visa
Citizens of most countries need a visa when traveling to Nepal.
Most can obtain Nepalese visa on arrival, when arriving to Nepal either by plane or overland.
You can obtain Nepal visa on arrival at the following entry points: TIA airport (Kathmandu), Kakarvitta (Jhapa), Birganj (Parsa), Kodari (Sindhupalchowk), Belahia (Bhairahawa), Jamunaha (Nepalgunj), Mohana (Dhangadhi), Gaddachauki (Mahendranagar), Rashuwagadi (Rashuwa).
There are several options:
- 15 days (25 USD),
- 30 days (40 USD),
- 90 days (100 USD).
You don’t need a document photo or anything else in order to obtain Nepalese visa. Only your passport and money.
For possible changes check the website of Department of Immigration of Nepal.
Step 4: Obtaining a Trekking Permit and TIMS
You need to obtain 2 “papers” before you can start the trek. Both of them are being checked regularly, as you are hiking from a village to village.
One is a trekking permit – ACAP or Annapurna Conservation Area Permit. The other is TIMS card or Trekkers’ Information Management System card.
You can obtain ACAP and TIMS yourself, by visiting Nepal Tourism Board in Kathmandu or Pokhara.
You can obtain ACAP and TIMS yourself, by visiting Nepal Tourism Board in Kathmandu or Pokhara.
They cost 2000 NPR each (around 18 USD).
Or you can pay extra and get any trekking agency in Kathmandu or Pokhara to do it on your behalf. Once you arrive to Thamel, the most popular part of Kathmandu among tourists, you’ll see plenty of trekking agencies.
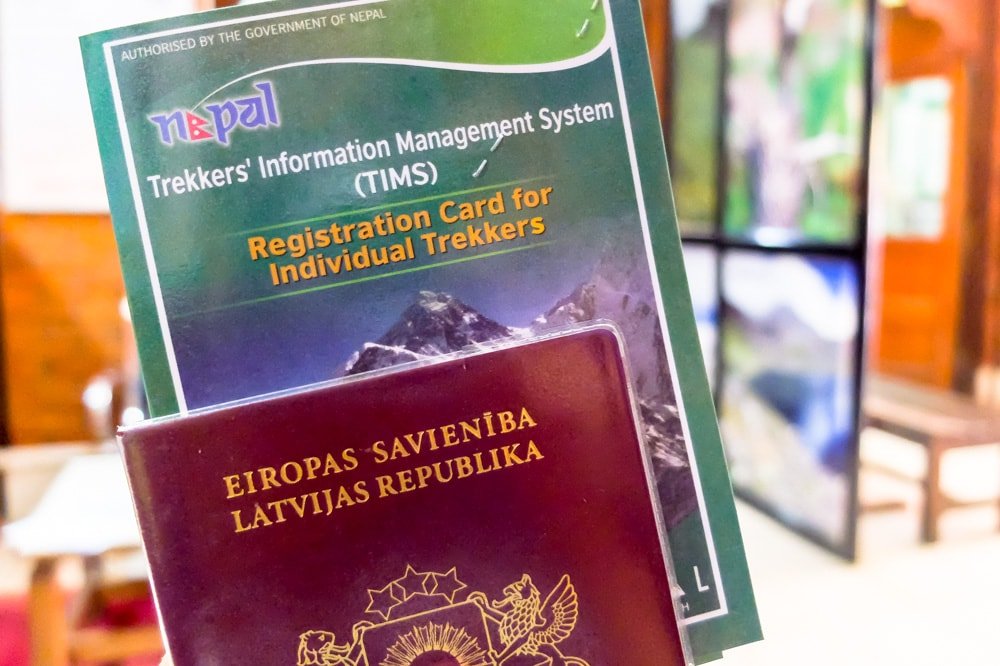
What’s necessary to obtain TIMS and ACAP?
Passport, 2 photocopies of your passport, 4 document-sized photos, travel insurance and itinerary.
It’s possible to make photocopies at the office of Nepal Tourism Board in Kathmandu. What size should your photos be? It doesn’t matter, as long as they are what you could call document-sized photos.
Travel Insurance for the Annapurna Circuit
Speaking of travel insurance, take into account the altitudes you’ll be hiking at.
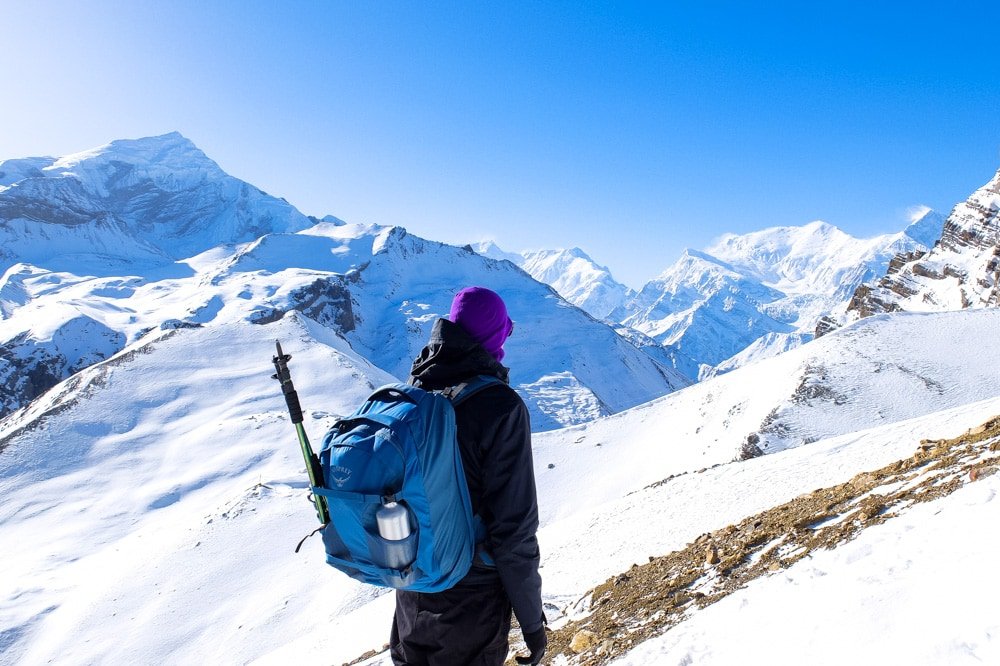
The maximum being over 17 000 ft. The highest point you’ll cross will be Thorung La pass, which sits at 17,769 ft / 5,416 m above sea level. Most standard travel insurance packages don’t cover activities at such an altitude.
That’s one of the reason, why I choose World Nomads Explorer package.
World Nomads is a travel insurance trusted by Lonely Planet, Rough Guides, Eurail, Nomadic Matt and Intrepid Travel.
Trekking or Hiking the Annapurna circuit without the use of special equipment would not be considered free mountaineering.
Which World Nomads Travel Insurance Package to Choose
If you’ll be crossing the Thorung La pass – Explorer.
If you don’t plan to go over 14,763 ft / 4,500 m – Standard will be enough.
Does really World Nomads cover the Annapurna Circuit trek, if you do it solo?
Short answer – Yes.
I asked this question World Nomads. Here is their answer:
There is no problem with you trekking on your own, just be aware of special exclusion (iii) under Section 8 (Adventure, Work, Study & Volunteering) which states that there is no cover for:
“Free mountaineering, climbing in remote or inaccessible regions, exploratory expeditions and new routes, high altitude climbing over 6,000 metres, mountaineering expeditions or activities within Antarctica, the Arctic Circle or Greenland.”
Trekking or Hiking the Annapurna circuit without the use of special equipment would not be considered free mountaineering.
You can add extra cover for Sports/Activities called Adventures cover.
This ranges from Level 1 to Level 3.
The Standard plan comes with level 1 Adventures and the Explorer plan comes with level 2.
Level 1 covers you hiking up to 4,500 metres while level 2 covers you hiking up to 6,000 metres.
If you are hiking up to 5,416 metres, level two cover would be required if you wanted to be covered for the entirety of the trek.

Step 5: Creating Annapurna Circuit Itinerary / A Map of Annapurna Circuit Trek
Most probably you have it already. If not, now is the time to write down your Annapurna Circuit trek itinerary.
Here is a Lonely Planet book on trekking in Nepal, which will be a great help.
How I went about it when I was trekking the Annapurna Circuit for the first time? I just went to a shop in Kathmandu and bought myself a map of the Annapurna Circuit (see an online map). I choose one which had a day by day itinerary inside it. You can do like I did, go and buy a real paper map. A map will give you more understanding about the part of Nepal you’ll be hiking in.
Or you can write down an itinerary. And… simply follow it.
Here are 2 examples.
1) Full Annapurna Circuit Trek, 17 Days of Hiking
Besi Sahar – Ngadi – Syange – Tal – Danakyu – Chame – Upper Pisang – Manang – a full day in Manang to acclimatize – Siri Kharka – Ledar – Thorung Phedi – Muktinath – Jomsom – Larjung – Ghasa – Tatopani – Beni.
2) Annapurna Circuit Trek, 10 Days of Hiking
Tal – Danakyu – Chame – Upper Pisang – Manang – a full day in Manang to acclimatize – Siri Kharka – Ledar – Thorung Phedi– Muktinath – Jomsom.
To save a couple of days you can start trekking from Chame.
As a result you could finish the Annapurna Circuit trek in 12 days, taking into account getting to and from the trek.
But remember that Chame sits already at 8,700 ft / 2,600 m above sea level. If you aren’t used to high altitudes, it may mean a more difficult hike. Because when you start from lower altitudes and ascend slowly it gives your body more time to adjust to these new conditions.
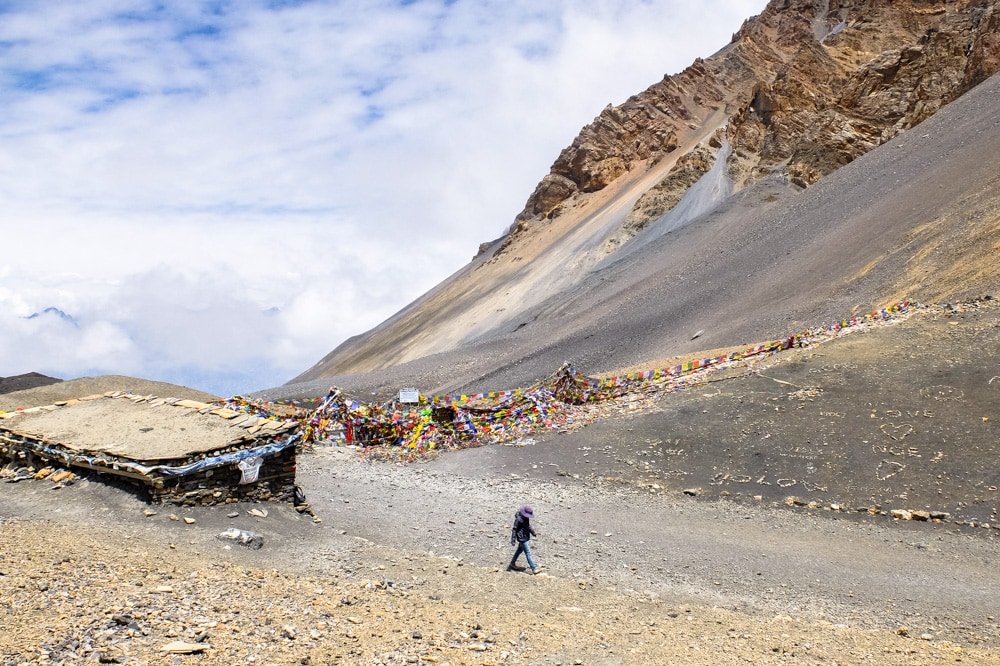
Thorung Phedi or High Camp: Where to Stay
Right before the highest point of the trek – Thorung La Pass – there you have two options.
You can stay in Thorung Phedi (14,895 ft / 4,540 m) or you can stay one-hour walk higher in the mountains, in High Camp (16,010 ft / 4,880). The main difference here is the altitude.
I recommend you to stay in Thorung Phedi.
Because if you get sick at this altitude, in Thorung Phedi you at least will have a rather easy option to get to lower places. While to get down from High Camp you will first need to make a very steep hike down the mountain.
Step 6: Getting to the Starting Point (and Back)
If you want to use only one mode of transportation for the whole journey, there is only one option – a private car.
The rest of options include at least 2 modes of transportation.
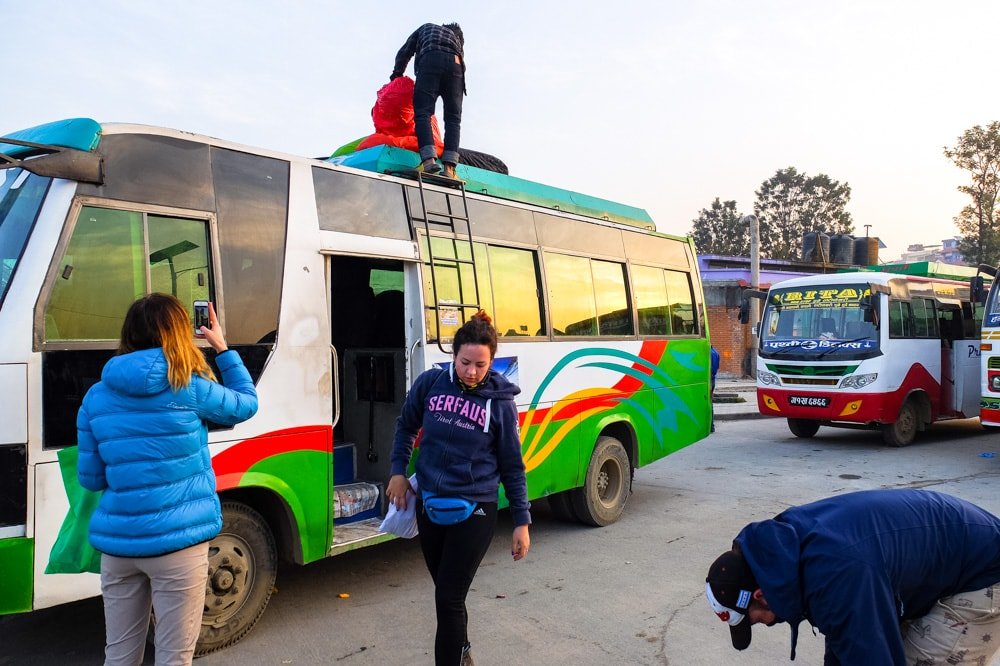
Getting From Kathmandu to Besi Sahar / Bhulbhule
There is a local bus going all the way from Kathmandu to Besi Sahar and Bhulbhule.
Since it’s a long drive, bus leaves Kathmandu at around 7 AM. Journey takes more or less 10 hours. The ticket costs around 500 NPR one way (around 4,5 USD).
There is also a tourist bus going in the same direction. But it doesn’t go all the way. You need to get out at Dumre. And from there you still have to take the same old and rusty local bus to make the final and bumpiest part of the journey. Price-wise local bus will be the right choice for you. Comfort-wise tourist bus is a clear winner.
Alternatively you can take a shared car from Dumre to Besi Sahar, Bhulbhule or some other place further in the mountains.
Getting to Tal or Chame
Ask around at Dumre or Besi Sahar to find a shared jeep going to a place where you want to get to. Agree on price.
In Bhulbhule it might be harder to find a car, because it’s an even smaller town.
Don’t see anyone whom to ask? Go to any hotel or guest house.
You will surely find one. Because that’s also how locals are getting around in the mountains.
Getting From Jomsom to Pokhara (and Kathmandu)
There is an airport in Jomsom. But there are no direct flight from Jomsom to Kathmandu.
If you prefer to take the fastest option and to fly back, you will need to book 2 flights. One from Jomsom to Pokhara. And then another flight from Pokhara to Kathmandu.
There is a local bus going from Jomsom to Pokhara. A ride costs 1000 NPR. Journey takes around 10 hours. And you’ll have to change a bus to a bigger one in Beni.
A shared jeep will cost you around 1700 – 2000 NPR. For the same journey.
The journey may take the same as long, but mostly it’s gonna be a bit more comfortable ride.

Step 7: Accommodation on the Annapurna Circuit
You don’t have to carry a tent while trekking the Annapurna Circuit.
In fact, if you are hiking in summer you may not even need a sleeping bag. Because there are a lot of cheap and decent guest houses on the trail. And they also provide blankets. For most of the time you’ll see one every hour or two. In all bigger villages there are at least 10-20 guest houses / hotels, often called tea houses.
How Much Do They Cost?
Mostly it will be something like 100 – 500 NPR for a bed or single room, 300 – 1000 NPR for a double room.
You may agree or that might be offered that you don’t pay for the room, as long as you eat at their restaurant. All hotels on the Annapurna Circuit have a restaurant. In 2017, when there were 4 of us hiking together, only twice did we pay for our accommodation.
Toilets and bathrooms mostly are shared. There is usually one or two of them per floor.
As you go higher in the mountains taking a shower will most likely cost you extra 50 – 200 NPR.
At some places they have a solar shower, which usually is for free. Ask about it! At the same time don’t expect to have a hot shower if there is no sun today. For that reason many hotels have gas showers.
In villages after Manang WiFi and electricity may also cost you extra – 100 – 300 NPR per person/charge.
There is WiFi all the way until Ledar. And after the Thorung La pass – in all villages and towns.
Twice I have experienced mobile networks going down for a couple of days because of bad weather. If that happens, there will be no WiFi. So be prepared, that you may not be able to connect to the internet.

Step 8: Planning a Budget for the Annapurna Circuit
The most important thing to remember about money – there are no ATM’s in the mountains.
The last one is in Besi Sahar and afterwards there is one only in Jomsom.
So, take enough cash with you. Plus, just in case, take a couple of hundred dollars or euros in cash. Exchanging those will not be a problem at almost any hotel. But better take smaller bills (10, 20). And don’t expect to get the best exchange rate.
There are many ATM’s in Kathmandu and Pokhara.
But I would recommend you not to rely on them and bring cash, and then exchange it in Kathmandu.
Here Is My Annapurna Circuit Trek Cost Estimate:
- xxx USD – Flights;
- 25 USD – 15-day visa;
- 36 USD – ACAP & TIMS;
- Around 20 USD – Getting to starting point an back by bus;
- 280 USD – Daily expenses for 14 days (10 days of hiking + 4 extra days).
Total costs of a 2-week adventure: 361 USD + flights.
I have done it also spending around 15 USD/day. It’s possible. It’s also possible to spend more than 20 USD/day. So I’m using this estimate as an average. But you should adjust it accordingly to your needs.
Total costs of a 2-week adventure (in 2019): 361 USD + flights.
To help you with this task, I’ll give you some price examples.
A bar of chocholate (mostly Snickers) in the mountains costs about 150 – 200 NPR. A bottle of beer – about 500 NRP. A big pot of ginger – lemon – honey tea costs about 600 – 2000 NPR. A cup of black tea – 40 – 90 NPR. But once you are getting closer to the Thorung La pass even a cup of hot water may cost you 70 NPR or 0.6 USD.
The cheapest meals you can get on the Annapurna trek are soups (150 – 350 NPR) and fried or boiled eggs (150 – 300 NPR).
But anything more filling, like pasta, dal bhat, momo, burgers, pizzas and sandwiches mostly cost between 350 and 600 NPR.
And, yes, you can quite easily get pizza and pasta while trekking around Annapurna.
What about drinking water? Most hikers drink tap water, that they purify using water purification tablets. I’m not an exception. It’s not the tastiest water you get in the end. But it’s ok and it’s better for environment, as you don’t produce extra garbage, which you would, if you keep buying packaged water.
A bottle of water in the mountains costs around 50 – 100 NPR at lower altitudes and close to 200 NPR for 1 liter of water at higher altitudes.

Annapurna Circuit Packing List
Let’s start with the most important – a quality backpack, comfortable hiking shoes or boots, a rain jacket and a sleeping bag.
I’m currently using and can recommend the Osprey Fairview 40 backpack. It was just right size for me, and I could even fit in my sleeping bag, which isn’t the smallest one. Something of this size or a little bit bigger will be the right choice.
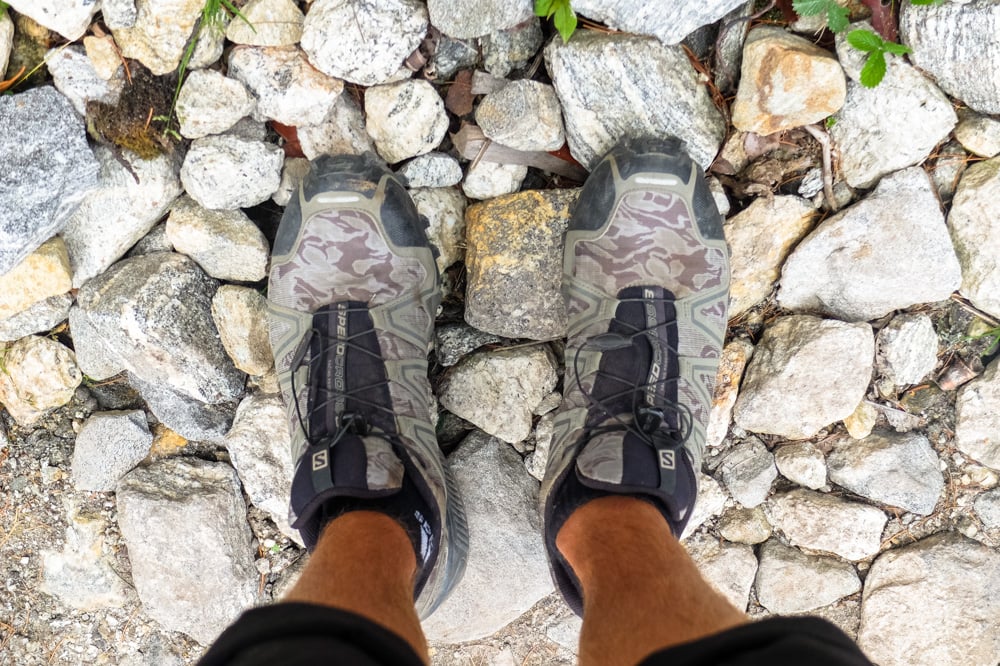
I have done the Annapurna Circuit in Salomon Speedcross 3 trail running shoes.
Now I would look for a newer model – Salomon Speedcross 4. These shoes are so light, which makes the whole experience very enjoyable. In early spring, autumn and winter, when there is a high possibility of snow and mud on the trail, I would however recommend you to look for something more sturdy.
A decent rain jacket – Columbia Men’s Watertight Ii Jacket. I have used something very similar from Columbia for few years.
A sleeping bag – Kelty Tuck (budget), Hyke & Byke Eolus.
Shoes & Clothing
- A pair of good hiking shoes or boots;
- Flip-flops for evenings;
- 3 pairs of socks;
- Long pants;
- Waterproof pants (just in case);
- Thermal pants;
- 3 pairs of boxers;
- 2 t-shirts;
- 2 or 3 long sleeve thermals;
- 1 warm fleece jacket;
- Scarve;
- Hat;
- Waterproof jacket.
Trekking Equipment and Accessories
- Backpack;
- Trekking poles;
- Sleeping bag;
- Sunglasses (a must-have);
- Water bottle;
- Torch;
- Waterproof pouch for your valuables.
See our ultralight backpacking gear recommendations.
Electronics
- Smartphone;
- Camera;
- Chargers.
No, you don’t need a laptop for the Annapurna Circuit.
Toiletries and Accessories
- Toilet paper;
- A few packages of tissues;
- Wet wipes;
- Hand Sanitizer;
- Sunscreen (SPF 50);
- Toothbrush and toothpaste;
- Nail clippers or scizzors;
- Shower gel;
- Microfiber towel.
Medicine
- Your prescription medicine;
- Water purification tablets;
- Some band aids;
- Hydrogen peroxide;
- Tiger balm;
- Strepsils;
- Koflet;
- Pain killers;
- Aspirin;
- Loperamide;
- Dexamethasone;
- Activated charcoal.
Food?
Take some snacks. You will want them, trust me.
They are cheaper in Kathmandu and the choice is much bigger.
Or bring some from home.

Side Trails of the Annapurna Circuit
There are several side trail options on the Annapurna Circuit.
One of the best known side trails of the Annapurna Circuit leads to Tilicho Lake, one of the world’s highest lakes.
If you would like to go to Tilicho lake, count in 2 more days.
Hiking to Tilicho Lake
From Manang there are 2 trails going almost in the same direction.
One leads to Ledar (afterwards to the Thorung La pass), the other – to Tilicho lake. If you’ll be hiking to Tilicho lake, stop on the way at Siri Kharka to have lunch. Afterwards you’ll have no such an option. Soon after Sir Kharka there is a landslide area, the most dangerous part of this side trail. You can see it in the photo above.
Be extra cautious in this part. Regular landslides are happening there.
Finish your day in a hotel at the Tilicho base camp.
Wake up early the next day. Take only water, some snacks and camera, and hike to Tilicho lake. It will take you around 6 hours to hike to the lake and back.
After a lunch at the hotel, continue further to Siri Kharka.
To continue your trek to Ledar the day after.
Annapurna Circuit During the Monsoon Season
In 2016 I did the Annapurna Circuit at the beginning of monsoon season in Nepal.
In the photo above you can see how it looked at the altitudes of around 16,400 ft / 5000 m then. Here is how it can look there at the end of March. Quite a difference, huh?

I started the hike at the very end of May and finished in mid-June.
The Annapurna Circuit is a rather safe choice also during monsoon. Because most of the trail lies within a so called rain shadow. Hence rain isn’t a big problem, especially at higher altitudes. In 2016 I experienced rain only 5 times. It rained almost non-stop on the very first day, for a few hours on the next day and then only during the nights (3 nights) at the very end of the trek.
Overall it was a very pleasant hiking experience. It wasn’t too hot, and it was never really cold.
In the photo below you can see the highest point of the Annapurna Circuit – Thorung La pass – where, as you can see, there was no any snow in June. Another difference is the number of hikers. In June there was almost no any other hikers. And on Thorung La pass there were only 2 other hikers.
Didn’t it feel unsafe because of that? Only a little bit and on some occasions.
Mostly there still are local people, whom you can ask for help, if there is such a need.
The Annapurna Circuit Trek: Frequently Asked Questions
1. When to Hike the Annapurna Circuit Trek
The best season for the Annapurna Circuit is autumn (October, November) and late spring (April).
While autumn and late spring is considered to be the best season, it doesn’t mean it’s the only time you can hike the Annapurna Circuit. Here are some things you need to know about weather on the Annapurna Circuit and in Nepal.
Summer (between June – Augst) is monsoon season in Nepal. It’s hot and wet during these months.
However, since most of the Annapurna Circuit trek sits within a so called rain shadow, rain isn’t a big problem in this part of Nepal. Not in June at least. And definitely not at a higher altitudes. If you are fine with higher temperatures and probably getting wet on the first and last days, then rainy season in Nepal still might be a good season for you to do the circuit.
What about winter in Nepal? It can be very cold in the mountains. Especially at nights and at a higher altitudes. Temperature-wise mostly not colder than than -4°F / -20 C, though. You may experience lots of snow and harsh winds. At the same time you may not get any snow on the trail at all. Because of how far South is Nepal that may happen as well.
If you are thinking of hiking during the winter or early in the spring, don’t forget to take a warm sleeping bag. There is no heating in mountain hotels along the trail.
2. How Long Does It Take to Trek the Annapurna Circuit
All in all you should count at least 2 full weeks for the Annapurna Circuit trek. Plus the time spent to get to Nepal, which in most situations will add 2-3 days. Traveling from the US or Europe to Nepal mostly takes around 24 hours hours each way.
– If you do the whole trek from Besi Sahar to Beni, it takes around 17 days. Including one day of rest in Manang to acclimatize better. But that doesn’t include any side treks, like Tilicho lake.
– If you start from Besi Sahar, but finish in Jomsom, you can do it in 11 – 12 days. Jomsom is a rather big town in Himalayas. There is even an airport and ATM. And that’s also where most of people finish their Annapurna trek.
– If you start from Tal and finish in Jomsom, you can do it in 10 days. Including one day of rest in Manang.
When planning your adventure, don’t forget to count in at least 4 more days. 3 days for transportation and 1 extra.
If you’ll be traveling by public transportation in Nepal, note that it takes almost 1 full day to get from Kathmandu to Besi Sahar. And 2 days to get from Jomsom to Kathmandu, traveling by jeep and bus (or bus & bus). Add 1 day to get your trekking permit and rest a little bit in Kathmandu.
When planning your adventure, don’t forget to count in at least 4 more days.
If you’ll start trekking from Tal, Chame or Lower Pisang, you will not make it on the same day.
Unless you travel the whole way by a jeep. Because the bus journey from Kathmandu to Besi Sahar can take up to 14 hours. And Besi Sahar is still a few hour ride away from Chame.
3. How Much Does It Cost to Trek the Annapurna Trail
Around 20 USD per day will be sufficient for a solo hiker.
Everything is cheaper in Pokhara and Kathmandu than it is in the mountains. So there is no need to budget the same amount of money for these days. But I would buget it anyway. So you have some spare money for things you may have forgot about.
Here Is My Annapurna Circuit Trek Cost Estimate:
- xxx USD – Flights;
- 25 USD – 15-day visa;
- 36 USD – ACAP & TIMS;
- Around 20 USD – Getting to starting point an back by bus;
- 280 USD – Daily expenses for 14 days (10 days of hiking + 4 extra days).
Total costs of a 2-week adventure: 361 USD + flights.
4. Annapurna Circuit Trek or Annapurna Base Camp Trek
If you have enough time and you are feeling reasonably fit, go for the Annapurna Circuit.
If you are short on time or you are worried about the Thorung La pass, go for the Annapurna Base Camp trek. I would like to add, that if you have time and you are taking it easy, then the pass shouldn’t be a problem for you. Well, it will be hard, but it’s doable by most with enough willpower.
Do you have any questions about the Annapurna Circuit? Or about Nepal in general? Do not hesitate to get in touch with us here or on Facebook!
Book Your Trip Like a PRO
1. Book Your Flight. Find cheap flights using Kiwi.com, Momondo.com. Or subscribe to Dollar Flight Club, if you don’t want to be searching for the flights yourself. Kiwi currently is my first choice.
2. Book Your Accommodation. Booking.com, Agoda.com and Airbnb. I use Booking and Agoda at least a dozen times a year, and Airbnb – when looking for a long-term stay. My best tip is to ALWAYS compare the price. Sometimes the same hotel is cheaper on Booking.com, other times – on Agoda. Always compare the price!
3. Buy Your Travel Insurance. Ekta and SafetyWings are two companies I can recommend. Ekta offers some extra benefits, that will be important for those doing some higher risk activities (make sure to choose the right plan!), while SafetyWings is better for digital nomads. SafetyWings is also very affordable.
Disclaimer for Amazon Associates: MakeAdventureHappen.com is a participant in the Amazon Services LLC Associates Program, an affiliate advertising program designed to provide a means for sites to earn advertising fees by advertising and linking to amazon.com. Amazon and the Amazon logo are trademarks of Amazon.com, Inc. or its affiliates. As an Amazon Associate I earn from qualifying purchases.